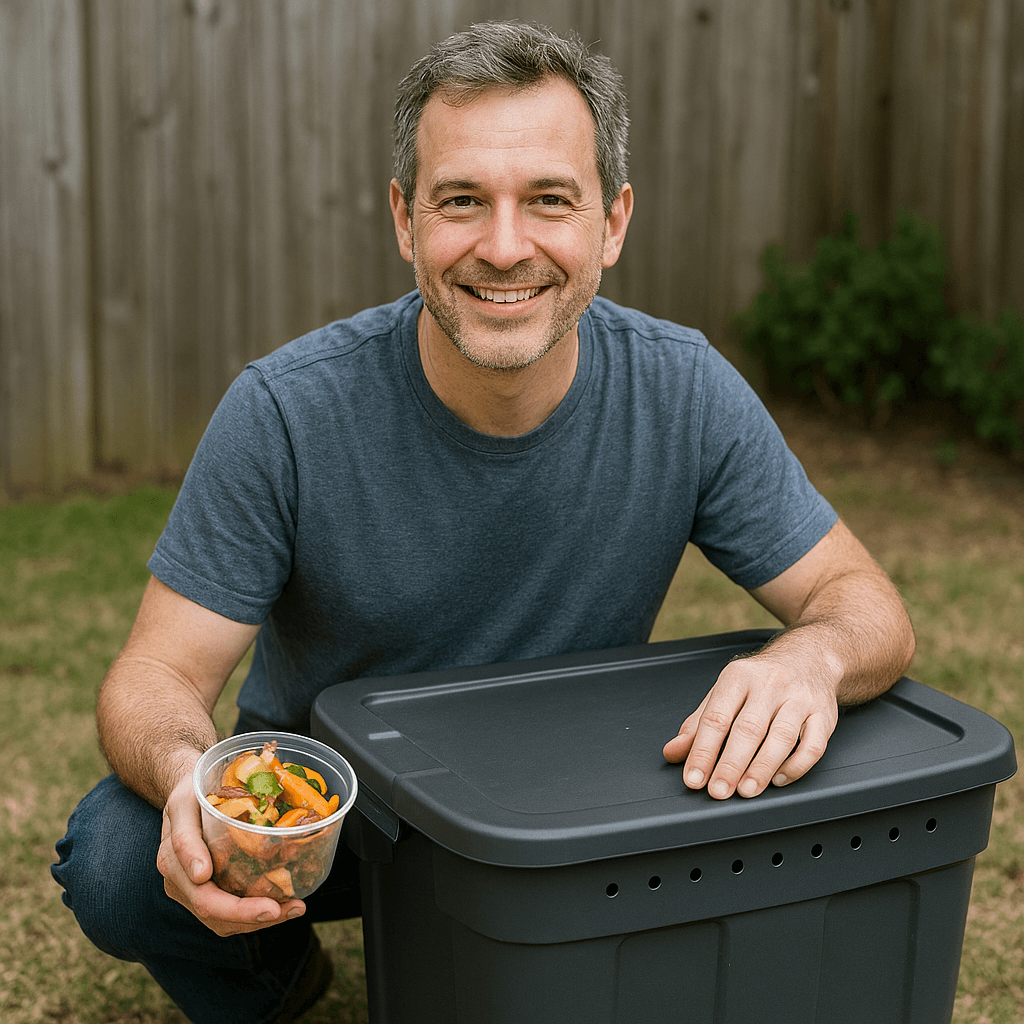
Let me tell you about my first compost bin. It was a cheap plastic bucket with no holes, filled with raw chicken bones and fruit scraps. I sealed the lid tight, put it under my kitchen sink, and waited for magic to happen. Two weeks later, I opened that lid and unleashed an unholy smell that made my wife threaten divorce and our cat hide under the bed for three days. That's when I realized I had no idea what I was doing. My neighbor actually knocked on the door and asked if our sewer line had burst. It hadn't. It was just my compost.
The good news? You don't have to repeat my mistakes. After that disaster, I spent months researching, testing, and failing until I finally cracked the code. Today, I'm going to show you everything I wish someone had told me before I turned my kitchen into a biohazard zone. If you want to turn banana peels into garden gold without making your whole neighborhood hate you, you came to the right place. No fancy gear. No science degree. Just me, a drill, and some very questionable life choices that actually worked out.
- How to build a functional compost bin for under $5 (or totally free).
- The simple formula to keep it completely odorless (I learned this the hard way).
- How to know exactly when your "Black Gold" is ready for your plants.
- Advanced troubleshooting for heat, cold, and pests.
- 3 different bin designs for small spaces, apartments, and large backyards.
Which Compost Bin Is Right For You?
Before you drill a single hole, let's talk about what kind of bin fits your lifestyle. Not everyone needs the same setup, and choosing the wrong type is the fastest way to give up in frustration.
| Bin Type | Best For | Cost | Pros & Cons |
|---|---|---|---|
| Single Bin (DIY) | Small yards, beginners | $0-10 | Cheap, easy, portable / Small capacity |
| Dual Bin System | Committed composters | $20-30 | Two bins allow rotation / Takes more space |
| Tumbler (Commercial) | People with bad backs | $80-150 | Easy to turn, pest-proof / Expensive, small |
| Worm Bin (Vermicompost) | Apartments, indoors | $20-40 | Odorless, produces tea / Worms can die |
| Bokashi Bucket | Meat/dairy composters | $30-50 | Handles everything / Requires burying final product |
My recommendation: Start with a single DIY bin. It's cheap, forgiving, and teaches you the basics. Once you're hooked (and you will be), you can upgrade to a dual system or tumbler. I still use my original bin for yard waste and a tumbler for kitchen scraps.
The Great Myth: Why You Don't Need Fancy Gear
If you search for "compost bins" on Amazon, you will be flooded with beautiful, rotating tumblers that cost upwards of $100. Don't press that "Buy Now" button just yet. The microbes and worms breaking down your organic material do not care if they live in a designer plastic tumbler or an old storage bin you found in your garage. They just want food, air, and moisture. Your wallet will thank you later.
- A Plastic Storage Bin: Any 5 to 18 gallon plastic container with a lid works perfectly. Check Facebook Marketplace or ask neighbors — people throw these away constantly.
- A Power Drill: Or a hammer and a thick nail to poke crucial ventilation holes. A drill is easier, but desperation works too.
- A Spray Bottle: Filled with regular water to manage moisture. A $1 bottle from the dollar store is fine.
- Old Newspaper or Dry Leaves: Your base layer to prevent any wet mess. Save your junk mail and shred it.
Where to Put Your Compost Bin (Location Matters)
Location can make or break your composting experience. I learned this after putting my first bin in direct sunlight and cooking my microbes to death.
- Partial shade: Too much sun dries out the pile and kills microbes. Too much shade keeps it too wet. Aim for morning sun, afternoon shade.
- Easy access from the kitchen: If it's a pain to walk to, you won't use it. I keep mine just outside the back door.
- Level ground: Helps prevent tipping and keeps moisture distributed evenly.
- Away from wooden fences: Compost can stain and accelerate wood rot. Leave a 1-2 foot gap.
- Near a water source: You'll need to add water occasionally. A hose or rain barrel nearby saves effort.
- Not too close to neighbors: Even a well-managed pile can have occasional odors. Give it some breathing room.
 This is my current setup — partial shade, three steps from the kitchen, ten feet from the neighbor's fence. Perfect balance.
Step by Step: Building Your First Bin in 10 Minutes
Step 1: The Ventilation Extravaganza. Microbes are living creatures. If you lock them in a plastic tomb without oxygen, they die, and anaerobic bacteria take over. Those are the guys that make your bin smell like rotten eggs. Take your drill and make 15 to 20 small holes all over the lid and around the top sides of your bin. Trust me — your nose will thank you later.
 See those tiny holes drilled along the top edge? That's the secret to keeping your microbes breathing and your neighbors happy. I learned this after The Great Stink of 2023.
When drilling these holes, keep them about 2 to 3 inches apart. You don't need a massive industrial drill bit. A standard 1/4 inch bit is perfect. If you make the holes too large, you are basically opening an all-you-can-eat buffet for local beetles and bugs. We want airflow, not a pest convention.
Step 2: The Drainage Holes (Crucial!). Water will accumulate at the bottom. If it has nowhere to go, your compost drowns. Drill about 5 to 10 holes in the very bottom of the container. Place a tray or a shallow plastic lid underneath the bin to catch any drips if you keep it on a porch. (Yes, I skipped this step on my first try. Yes, I regret it deeply. My porch had a brown stain for months.)
Step 3: The Base Layer. Take your shredded newspaper, cardboard, or crunchy dry leaves and throw them into the bottom of the bin. This layer should be about 3 inches deep. This acts as a mattress that absorbs excess moisture and keeps air circulating. Your gonna love how simple this is.
Feeding the Beast: Greens vs. Browns (Deep Dive)
Now that your box has air holes, it's time to feed it. This is where most people panic, but it's actually as simple as balancing two colors. Greens (Nitrogen and Wet) and Browns (Carbon and Dry). Think of Greens as the energy drink for your microbes, and Browns as the fluffy blanket that keeps everything from turning into a smelly swamp.
- Kitchen scraps: Fruit and vegetable peels, cores, ends, and spoiled produce.
- Coffee grounds and tea bags: Remove any staples from tea bags first.
- Fresh grass clippings: Mix immediately with Browns or they'll turn into slimy mats.
- Plant trimmings: Deadheaded flowers, spent vegetable plants, and green leaves.
- Manure from herbivores: Rabbit, horse, cow, chicken — but must be aged or composted first.
- Human hair and pet fur: Breaks down slowly but adds nitrogen. Good for keeping pests away too.
- Shredded cardboard and paper: Remove tape, labels, and glossy inserts first.
- Dry leaves: The gold standard of Browns. Stockpile them in fall for year-round use.
- Sawdust and wood shavings: Only from untreated wood. Avoid black walnut (toxic to plants).
- Straw and hay: Great for structure, but hay may contain weed seeds.
- Egg cartons (paper), toilet paper rolls, paper towel rolls: Shred or tear them up first.
- Pine needles: Use sparingly — they break down slowly and are acidic.
| 🟢 GREENS (Nitrogen / Wet) | 🟤 BROWNS (Carbon / Dry) |
|---|---|
| Fruit and veggie scraps | Shredded cardboard and paper |
| Coffee grounds | Crunchy dry leaves |
| Fresh grass clippings | Sawdust (untreated wood) |
The Golden Ratio. For every handful of food scraps (Greens), toss in two or three handfuls of shredded paper (Browns). Cover your food scraps with the dry stuff like a blanket. This simple trick hides the food from fruit flies and traps any potential odors instantly. I wish someone had told me this before my first bin became a fly hotel that attracted every insect in the zip code.
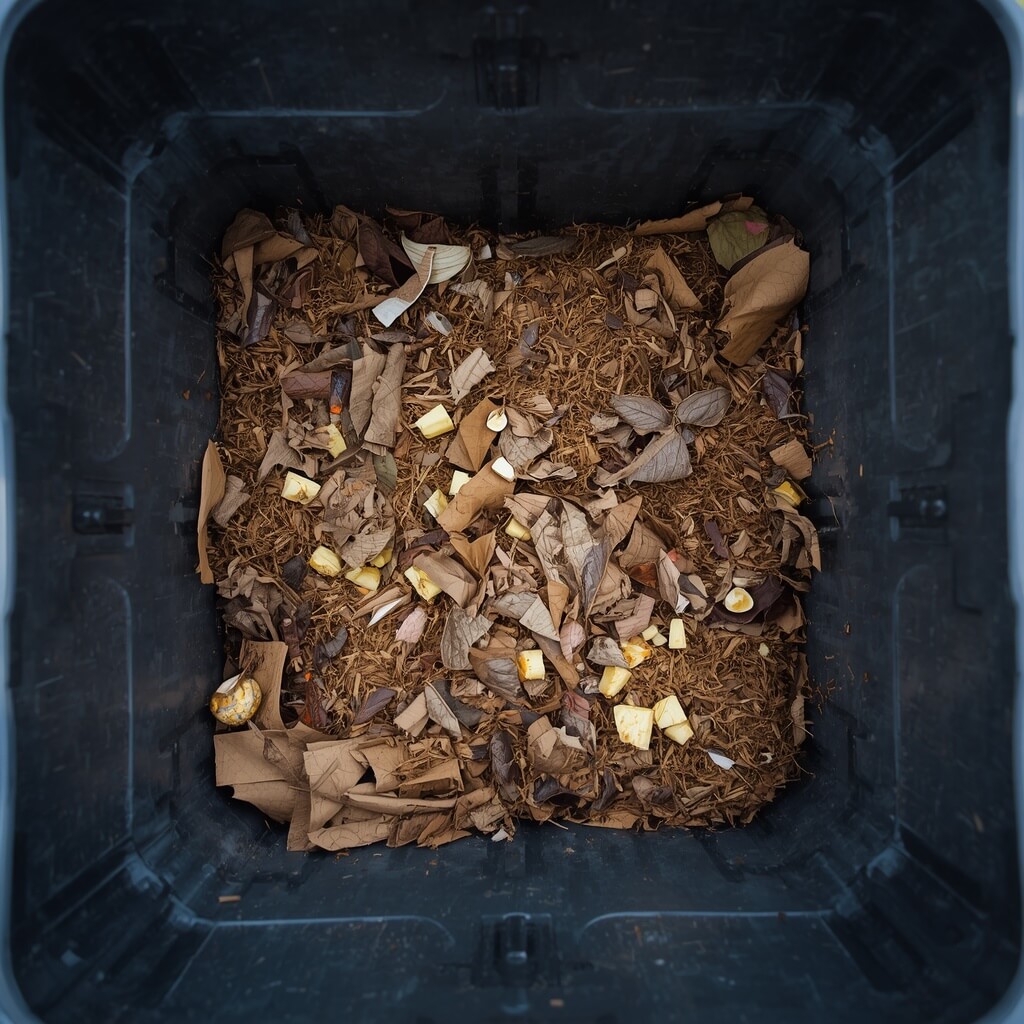
The Art of Layering: Coffee and Cardboard
Think of it like making a backyard lasagna. In this setup, I am mixing heavy nitrogen coffee grounds right into a bed of crushed carbon paper. Here is a massive pro tip that will save your pile. Size matters. If you toss an entire intact Amazon box in there, it will take a year to break down. Shred your cardboard into tiny pieces first. The more surface area you expose, the faster those microorganisms can eat it up. I found an intact pizza box in my pile six months later — embarrasing. Now I run everything through a paper shredder.
How to Maintain Your Compost (The 3 Keys)
Once your bin is built and you've started feeding it, maintenance is simple. Just focus on these three things:
Your compost should feel like a wrung-out sponge — damp but not dripping. Grab a handful and squeeze. If water streams out, it's too wet. Add Browns. If it's dusty and crumbly, it's too dry. Spray with water and add Greens. If it holds its shape when squeezed but no water drips, your doing great.
Once a week, stir your pile with a shovel or garden fork. This adds oxygen, which feeds your aerobic bacteria and prevents the stinky anaerobic kind from taking over. Don't go crazy — one good turn per week is plenty. More than that and you'll lose heat.
A healthy pile should feel warm to the touch in the center. If it's cold, your microbes aren't working. Add Greens (nitrogen) to heat it up. If it's hot (over 150°F), add Browns (carbon) to cool it down. You don't need a thermometer — your hand is fine. If it's too hot to keep your hand in for 10 seconds, it's too hot.
The Ultimate Troubleshooting Guide (Expanded)
Problem 1: "Help, it smells like a dumpster!"
The Fix. Stir the pile up to get some air in there and dump a massive amount of shredded cardboard on top. Stop adding food for a few days. The smell is usually ammonia (too much nitrogen) or sulfur (no oxygen). Both are fixable. (Yes, I've had to do this at 10pm. Yes, my neighbors were concerned. No, I didn't explain what was happening.)
Problem 2: "Nothing is happening."
The Fix. Your pile is dehydrated. Take your spray bottle and give it a good misting. Toss in some fresh kitchen scraps to wake the microbes up. If nothing happens after that, add a handful of finished compost or garden soil to introduce new bacteria — its like a microbial jump start for your bin. I keep a bag of aged compost specifically for this purpose.
Problem 3: "There are flies everywhere!"
The Fix. You're leaving food exposed on the surface. Bury your Greens under at least 3 inches of Browns. Also, check that your lid fits tightly. Fruit flies can get through tiny gaps — consider adding a fine mesh screen over your ventilation holes.
Problem 4: "My bin is full of ants."
The Fix. Ants mean your pile is too dry. Water it thoroughly and turn it. Ants don't like wet environments and will leave on their own. Don't use pesticides — you'll kill your beneficial microbes too.
Problem 5: "I see maggots (black soldier fly larvae)."
The Fix. Congratulations! Black soldier fly larvae are composting superheroes. They eat faster than worms and don't carry diseases. Leave them alone. They'll turn into harmless flies that don't bite or buzz around your house. This is a sign of a healthy, protein-rich pile.
How to Get Finished Compost Faster
Standard compost takes 2 to 6 months. But if you're impatient (like me), here's how to speed things up dramatically:
- Shred everything: Smaller particles = more surface area for microbes. Run cardboard through a paper shredder. Chop food scraps with a shovel or machete (carefully!).
- Maintain perfect moisture: Too wet or too dry both slow things down. Check every few days.
- Turn weekly: Oxygen is fuel for your microbes. Once a week is the sweet spot.
- Add compost starter: A shovel of finished compost or garden soil introduces billions of active microbes instantly.
- Use "hot" Greens: Coffee grounds, fresh grass clippings, and manure generate intense heat that speeds decomposition.
- Keep it warm: If you live in a cold climate, insulate your bin with straw bales or move it against a south-facing wall.
 This is what healthy compost looks like on a cold morning — steam rising means your microbes are working hard! I almost cried when I saw this for the first time.
No Backyard? 3 Indoor Composting Solutions That Actually Work
Don't let apartment living stop you. I started composting indoors before I had a yard. Here are three proven methods:
Red wiggler worms eat your scraps and produce castings (worm poop). It's odorless, compact, and perfect for apartments. A small bin under your kitchen sink can handle 1-2 pounds of food waste per week. The worms are quiet, don't escape, and don't smell. Check out my full worm bin guide here →
Uses beneficial bacteria to "pickle" your food waste in a sealed bucket. Handles meat, dairy, and citrus (which worms hate). Takes 2 weeks to ferment, then you bury the pickled scraps in soil or an outdoor planter. No smell, no pests, no worms to manage. Full Bokashi guide here →
Store scraps in a bag in your freezer. Once a month, take them to a community garden, a friend's pile, or a municipal composting drop-off site. Zero smell, zero pests, and you still divert waste from landfills. Many cities now offer free compost drop-off. Check your local recycling program.
The Patience Game: How to Know When Your Compost is Ready
In about 2 to 4 months, you will notice the bottom of the bin turning into a dark, crumbly, rich material that smells exactly like a fresh forest after a rainy day. When you can no longer recognize the banana peels, congratulations. You officially made your own Black Gold!
4 Signs Your Compost is Ready for Use:
- Dark brown/black color: Like coffee grounds, not like original ingredients.
- Earthy smell: Pleasant, like soil after rain. No ammonia, no rotten eggs.
- Crumbly texture: Falls apart easily in your hands. No slimy clumps.
- Cool temperature: The pile no longer heats up after turning. The microbes have finished their work.
The Bag Test: If you're still unsure, seal a handful of compost in a plastic bag for 3 days. If it smells bad when you open it, it's not stable yet. If it smells earthy, you're ready to go.
This is the moment you realize all the mess and smell was totally worth it. Go ahead — show it off to your neighbors. You've earned it.
How to Use Your Finished Compost (Don't Waste It!)
You worked hard for this black gold. Here's how to use it effectively:
- Soil amendment: Mix 1 part compost with 3 parts garden soil before planting vegetables, flowers, or trees.
- Lawn top-dressing: Spread a thin layer (1/4 inch) over your grass in spring or fall. Water it in.
- Mulch: Apply 1-2 inches around plants to suppress weeds and retain moisture.
- Compost tea: Steep a shovel of compost in water for 24 hours, strain, and use as liquid fertilizer.
- Seed starting mix: Mix equal parts compost, coconut coir, and perlite for homemade seed trays.
- Don't use unfinished compost: It will rob nitrogen from your plants instead of feeding them.
- Don't pile it against plant stems: Can cause rot or "burn" sensitive plants.
- Don't store it wet: Finished compost can go anaerobic if sealed in a bag while wet.
- Don't use compost containing diseased plants: Some pathogens survive the composting process.
Frequently Asked Questions (From Real Beginners)
No. Worms will find your bin naturally if it's on the ground. If your bin is elevated or sealed, you don't need worms at all — bacteria and fungi do most of the work. Worms are optional accessories, not requirements.
Yes, mostly. Most modern inks are soy-based and non-toxic. Avoid glossy magazine paper (clay coating) and thermal receipt paper (BPA chemicals). Standard printer paper, newspaper, and junk mail are fine.
Bury your Greens under 6-8 inches of Browns. Use a closed bin with a lid (not an open pile). Never add meat, dairy, or oily foods. If pests persist, use a metal hardware cloth liner (1/4 inch mesh) around the entire bin. Secure the lid with bungee cords or bricks.
Yes, with adjustments. A large pile (4x4 feet or bigger) generates enough internal heat to keep cooking. Insulate with straw bales or foam boards. Stop turning the pile (turning releases heat). Or just pause and store scraps in the freezer until spring. The microbes will wake up when temperatures rise.
That's actinomycetes! White, web-like growth is a sign of healthy decomposition. Actinomycetes are beneficial bacteria that break down tough materials like lignin (woody stems). They're your friends. If you see green, black, or blue mold, that's a problem (usually too much moisture). White = good.
Start small. A 10-gallon bin is perfect for a single person or couple. A family of 4 might need two bins or a larger 30-gallon tote. You can always scale up later. Running out of space is a good problem to have.
5 Tools That Make Composting Easier (None Are Expensive)
You don't need fancy gear, but these cheap tools make a huge difference:
- Aerator Compost Tool ($15-25): A long metal rod with wings that twists into the pile, adding oxygen without heavy lifting. Saves your back.
- Compost Thermometer ($15-20): Takes the guesswork out of hot composting. 18-inch probe reaches the core.
- Kitchen Counter Compost Bin ($10-20): A small, charcoal-filtered bucket for collecting scraps before taking them outside. No fruit flies. Essential for apartment composters.
- Paper Shredder ($30-40 used): Turns cardboard and junk mail into perfect browns in seconds. Worth every penny. Check Facebook Marketplace for cheap used ones.
- Compost Sifter/Screen ($10 DIY): Hardware cloth (1/4 inch mesh) stretched over a wood frame. Sifts out unfinished chunks from finished compost. Your plants will thank you.
Why Bother? The Real Benefits of Black Gold
After all this work, you deserve to know what you're getting. Finished compost isn't just "dirt" — it's a complete soil ecosystem that transforms your gardening results.
- Feeds soil microbes: Bacteria and fungi turn nutrients into plant-available forms.
- Improves water retention: Compost holds up to 200% of its weight in water. Less watering for you.
- Reduces fertilizer needs: Compost provides slow-release nitrogen, phosphorus, and potassium.
- Suppresses diseases: Beneficial microbes outcompete harmful pathogens.
- Reduces landfill waste: Food waste in landfills produces methane (a greenhouse gas 25x more potent than CO2). Composting prevents this.
- Saves money: Bagged compost costs $5-10 per bag. Your homemade version is free. I calculated that I saved over $200 last year.
 This is what finished compost looks like — dark, crumbly, and smells like a forest. My tomatoes went crazy after I started using this stuff.

Did you drill your first bin? Did you make a giant mess like I did? I want to see it!
Scroll down to our comment section below, click the camera icon, and upload a picture of your DIY compost bin. Let's troubleshoot your setup together! I promise not to laugh at your mistakes — I've made way worse ones.